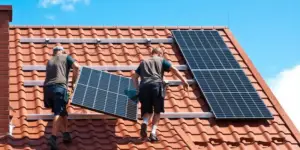
Using solar panels to power up your batteries is an eco-friendly approach, tapping into sustainable energy.
But before diving in, it’s essential to set up a charge controller, which ensures that the voltage from the solar panel is moderated when being transferred to the battery.
Without it, there’s a risk on bright sunny days that the panel might generate more energy than the battery can accommodate, leading to potential battery damage.
However, a solar panel with 5 watts or less can be directly connected to the battery.
This guide will delve into all aspects of using solar panels to charge solar batteries.
How to Charge a Battery With Solar Panels?
Harnessing energy from solar panels to charge your batteries is an eco-friendly and efficient way to utilize renewable energy.
But before you embark on this journey, it’s vital to have a charge controller in place.
This device moderates the voltage from the solar panel as it’s transferred to the battery.
Step 1: Setting up the Charge Controller
Position the charge controller on a sturdy surface, shielded from external elements.
Even if your solar panels are anchored securely and touted as weather-resistant, it’s a good practice to place the charge controller in a sheltered spot.
Then, lay out cables connecting the panel to the controller.
Step 2: Battery Connections
Your battery requires both positive and negative cable connections. Opt for cables with ring connectors compatible with the battery terminals, or use bare wires, securing them with clamps.
Ensure clarity between the positive and negative cables; for instance, black for negative and solid red for positive. If your battery bank is already wired, there’s no need for additional connections.
Step 3: Linking Wires to the Charge Controller
Insert the wire ends into the controller’s designated input ports. Typically, there’s no need for special connectors for these wire ends.
Just slot in the respective positive and negative wires and secure them using a screwdriver. Ensure correct connections to prevent potential damage.
Step 4: Charge Controller Wire Connections
MC4 connectors, commonly used with solar panels, should be employed to link wires to the charge controller.
These connectors, having both male and female components, ensure a secure fit. Connect the wires from your controller using MC4 connectors, then slot the bare wire ends into the charging connector’s input ports and tighten them.
Step 5: Linking Controller to Solar Panel
Once the wires are connected to the charge controller, you’ll have two free cables with MC4 connectors.
Align and connect these to the corresponding connectors on the solar panel. A firm “click” sound indicates a secure connection. Always ensure the connections are correct to avoid mishaps.
Step 6: Monitoring the Charge Controller Output
Most charge controllers feature a digital display, showcasing the current flow to the battery.
Ensure everything’s functioning as it should; a reading of 0 indicates a connection issue. Some advanced controllers even offer app connectivity, letting you monitor voltage remotely.
Step 7: Charging Process
Maintain the battery’s connection to the controller until it’s fully charged. Charging duration varies based on the battery’s capacity, solar panel efficiency, and current weather conditions. The controller’s digital display provides valuable insights.
Once the battery is nearly full, the output decreases. The charge controller will cease the energy supply to the battery once it’s fully charged, ensuring safety and efficiency.
Solar Panel and Battery Compatibility
When considering a solar energy setup, ensuring compatibility between your solar panels and the battery storage system is crucial.
Compatibility ensures optimal performance, longevity, and safety of the system.
Voltage Compatibility
Solar panels produce Direct Current (DC) voltage, and this voltage needs to be compatible with the battery’s voltage. For instance, a 12V solar panel is best suited for a 12V battery.
Despite this, there are exceptions to this principle. You can use a higher-voltage solar panel to charge a lower-voltage solar battery if you have a MPPT charge controller.
MPPT charge controllers allow for solar panels with a voltage higher than the battery voltage to be used.
An MPPT controller can adjust the higher voltage from the panel down to the battery’s voltage, maximizing the energy harvested from the panel and improving charging efficiency.
- Can I Use an 18v Solar Panel to Charge a 12v Battery
- Can I Use a 24v Solar Panel to Charge a 12v Battery
- Can I Use a 48v Solar Panel to Charge a 12v Battery
- What Size Solar Panel Is Needed to Charge a 36v Battery
It is unavailable if you have a lower-voltage solar panel.
Capacity and Size
The capacity of the solar panel system (measured in watts) should match the energy storage capacity of the battery (measured in watt-hours or kilowatt-hours).
A higher-capacity battery might be underutilized with a low-capacity panel, while a lower-capacity battery might get overcharged with a high-capacity panel.
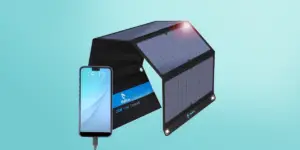
- Can a 5w Solar Panel Charge a Cell Phone Battery
- Can a 20w Solar Panel Charge a 12v Battery
- Will 40 Watt Solar Panel Charge a 12 Volt Battery
- Can a 100w Solar Panel Charge 100ah Battery
- How Much Solar Panel to Charge 600ah Battery
A charge controller sits between the solar panels and the battery, ensuring the battery is charged correctly and not overcharged.
Battery Types
Charging solar batteries of different types with solar panels:
- How to Charge Ni-MH Batteries with Solar Panels
- How to Charge a LiPo Battery with Solar Panel
- Can 320W Solar Charger 400Ah Lithium Battery
- Can You Charge a Lead Acid Battery with a Solar Panel
How Fast Does A Solar Panel Charge A Battery?
To provide a basic example:
Let’s say you have a 100W solar panel and a 12V 100Ah battery. Under ideal conditions, the solar panel might produce 80W of its rated capacity for about 5 hours a day.
Energy produced in a day = 80W x 5h = 400Wh or 0.4kWh
A 12V 100Ah battery has a capacity of 1200Wh or 1.2kWh.
If the battery were fully discharged, it would take: 1.2kWh ÷ 0.4kWh/day = 3 days to fully charge the battery under ideal conditions.
A higher-wattage solar panel will deliver more energy to the battery, charging it faster. For instance, a 100W solar panel will charge a battery faster than a 50W solar panel, given the same conditions.
More questions about how fast solar panels charge a solar battery:
- Will My Battery Charge Faster With 24v Solar Panel
- How Fast Will a 50-Watt Solar Panel Charge a Battery
- How Long for 100-Watt Solar Panel to Charge the Battery
- Do Solar Panels Charge Faster in Series or Parallel
How Far Can My Solar Battery Be From Solar Panels?
For smaller systems (like those for RVs or small cabins), it’s generally best to keep the distance between the solar panels and the battery as short as possible, often within 20 to 30 feet.
For larger installations, distances of 50 to 100 feet (or more) can be managed with appropriate wire gauges and system design. However, always calculate the voltage drop and consider the associated costs and energy losses.
Guidelines for Maximizing Solar Battery Charging
To optimize your solar battery charging experience, consider these guidelines:
- Positioning Matters: Place the solar panel in a location where it can bask in direct sunlight for the majority of the day. This positioning ensures optimal charging.
- Maintenance is Key: Regularly cleaning the solar panel enhances its efficiency. A simple wipe-down with a cloth or brush to remove dirt and debris is sufficient.
- Monitor Battery Health: It’s essential to periodically inspect the battery, ensuring it’s neither overcharged nor undercharged.
Solar Panel Charging Considerations
When you’re looking to charge a battery using a solar panel, several factors come into play.
Firstly, the panel’s size is paramount; it should be adequately sized to ensure the battery charges within the desired timeframe.
Secondly, the battery type matters. Some batteries demand more power for charging compared to others.
Lastly, weather conditions play a role. Cloudy or overcast days can prolong the charging process since solar panels thrive in direct sunlight.